

How To Check Nest Battery Level
Diagnosing a Nest Thermostat Depression Battery
If your Nest Thermostat is showing a depression power error or the Nest Thermostat Battery is low there is a simple fix that probably does non require you to supercede the battery on the Nest Thermostat.
Typically if you are getting a low ability fault on your Nest Thermostat or you have a low battery on your nest thermostat is means that you demand to add a Mutual Wire or C wire to your Nest Thermostat wiring. Below I volition teach you how to troubleshoot your Nest Thermostat Bombardment install a Nest C wire if needed.
It is very rare that y'all would need a Nest Thermostat battery replacement which is more difficult than installing a common wire and information technology's much more probable that y'all just demand to add a common wire which is a relatively simple solution.
This post covers the Nest Thermostat bombardment but if yous are looking for replacement batteries for your other Nest products like the Nest Lock and Nest Smoke Detector y'all can read our mail on nest replacement batteries for other nest devices.
Nest Low Battery
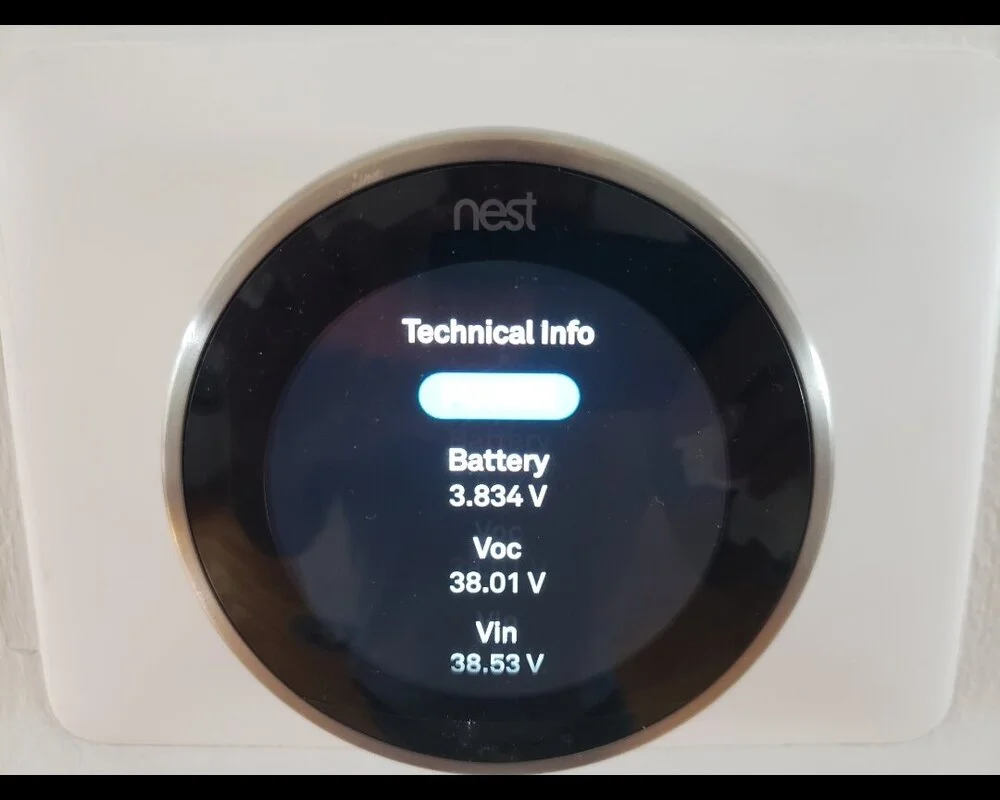
A typical reading for a Nest battery voltage when working properly is over 3.6V which is the bare minimum for the Nest Thermostat to operate. The voltage should exist higher once the Nest Thermostat has been installed for 24 hours or more than.
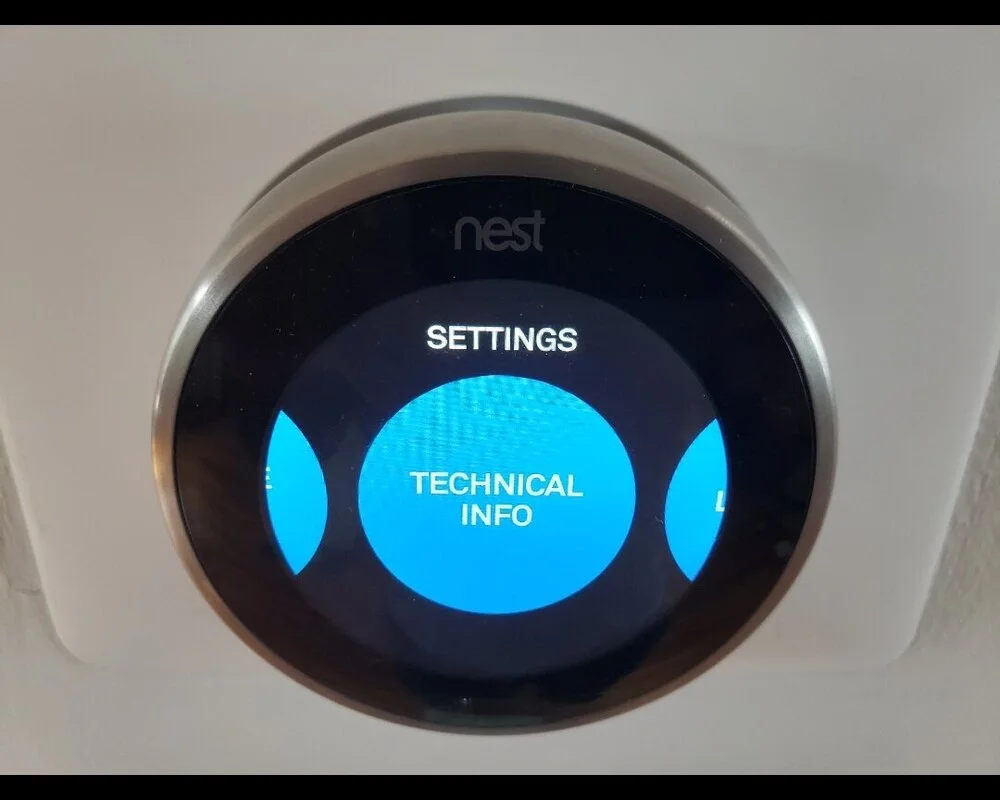
My Nest Thermostat battery voltage reads well-nigh three.8V or more and works perfectly. You tin observe your Nest Thermostat battery voltage by going to the settings menu, clicking on the technical info section and so selecting the power menu.
Nest Thermostat Battery Voltage Is Under Technical Info Carte du jour
Which volition and so display information on your nest thermostat battery voltage and nest power parameters. It'due south too a adept idea to scroll down in the power card by looking at the Lin voltage. If it is 20 or lower it could indicate you lot demand to add a common wire. Gyre down to acquire how to install a common wire. Nosotros recommend using a common wire transformer like this one to solve Nest low Battery problems.
Nest Thermostat Battery Voltage
Test Your Nest Battery
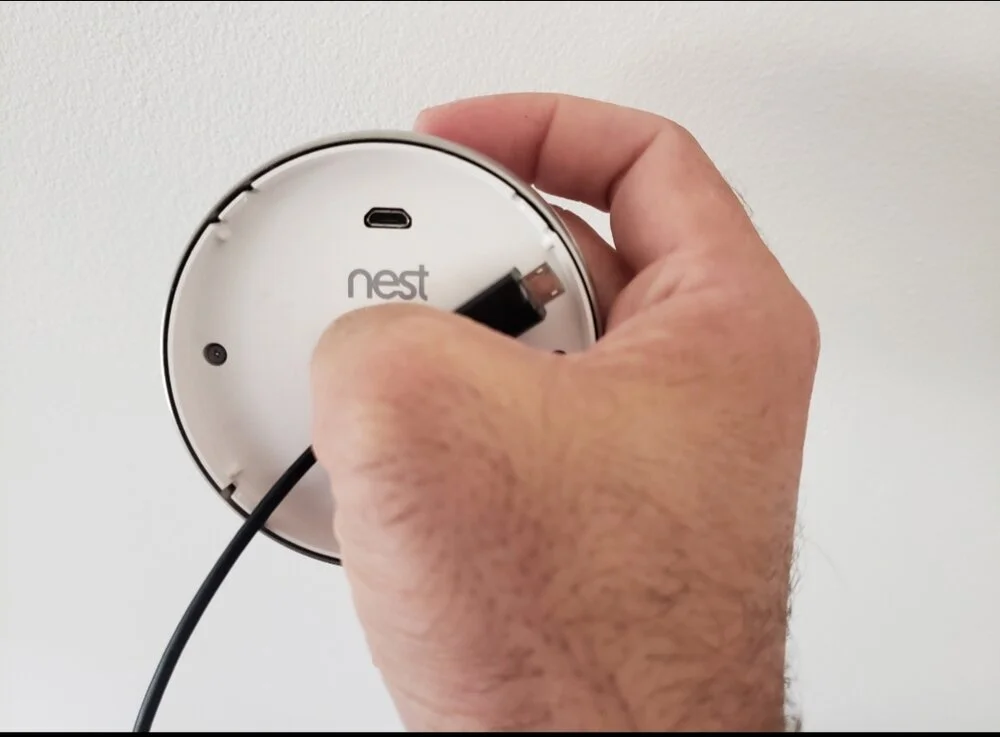
You can ostend that your Nest Thermostat battery is working properly by removing the Nest Thermostat from the wall and charging it with a usb micro b cable. If the Nest charges up, or turns on while charging information technology ways that the Nest is working properly and the Nest bombardment is charging just your HVAC system doesn't have enough power to go on the thermostat charged. This ways y'all volition demand to add a common wire. The picture below shows the Nest charging port on the back of the Nest Thermostat.

Nest Thermostat Battery Won't Charge
If your Nest Thermostat battery won't charge while it is on the Nest base plate in that location could exist ane of several issues. Your HVAC arrangement might not put out enough power in which case yous will need to add a common wire. Or the Rc or Rh wire which provides power to your Nest Thermostat might be loose, it's a good thought to turn the ability off, and bank check to make sure your Rc or Rh wire is secured properly in the Nest Thermostat base plate.
If your Nest Thermostat battery won't charge it could also bespeak and issue with your HVAC organization. It could mean that you have a diddled HVAC fuse or that your HVAC arrangement is detecting an outcome and shutting downwards. Information technology's a adept idea to cheque the HVAC fuse on your furnace to make sure that its not blown. Typically HVAC systems use 3 AMP fast interim fuses like these.
If the Nest Thermostat is completely dead, you should take it off the base plate, and endeavour to charge it using the usb micro b cable port on the back. If it turns on and charges or blinks it means that the Nest Thermostat is working properly and your HVAC system isn't providing plenty ability and you demand to add a Nest Common wire to your organization or check to make sure that your HVAC system is working properly.
It is very rare that your Nest Thermostat bombardment is the effect and that yous need to a Nest Thermostat battery replacement. I would try adding a common wire first before replacing the bombardment, and installing an quondam non smart thermostat beginning to confirm your HVAC system is actually working before replacing the Nest Thermostat battery. You lot could even test your HVAC arrangement past wiring your R wire and W white wire together with the thermostat off to confirm the system is turning on.
Still if yous exhaust all other options you can replace the Nest Thermostat battery with this replacement battery bachelor on amazon. Please scroll downwardly beneath to see the video procedure on replacing the battery.
Nest Thermostat Battery Life
If you lot're Nest Thermostat is getting sufficient power from your HVAC system your Nest Thermostat bombardment should last for years without any outcome. There are people with Nest THermostats from 2013 with the original bombardment that is nevertheless going strong. Theoretically if your Nest Thermostat is getting enough power from the HVAC organization the battery could final the lifetime of the thermostat.
If your Nest Thermostat is not getting sufficient power the Nest Thermostat battery life is typically a few hours too a day or two at which time the Nest will shut downwards and no longer command your HVAC arrangement.
Nest Thermostat Battery Replacement
I don't recommend replacing your Nest Thermostat battery until y'all have added a mutual wire per the instructions below and you lot take completed troubleshooting the Nest. If you lot are sure that it is y'all demand a Nest Thermostat battery replacement and so you can keep with replacing the Nest Battery.
To do so y'all will demand to showtime buy a nest replacement battery which are bachelor on amazon and is shown below.
So you volition demand to turn the power off to your HVAC organization and remove the Nest Thermostat from the wall. You tin and then remove the screws from the dorsum side of the nest to betrayal the battery and circuit board. You can remove the battery and install the new Nest bombardment and reinstall the backside cover plate.
Reinstall the Nest Thermostat and plow the HVAC power back on. The video below shows how to install the Nest Thermostat Battery. The process for replacing the Nest Battery is like for both the Gen 2 and Gen iii Nest Thermostat.
Mutual Wire Installation
Below we teach you lot how to install a Nest Common wire so you tin can become your HVAC system back up and running in no fourth dimension. The methods we teach below offering solutions for every situation so you can get your HVAC system upwardly and running. A Mutual Wire, which can too exist chosen a C wire is used to provide a continuous power source to your Nest Thermostat so that it'south internal battery ever stay'due south fully charged. Not all HVAC systems require the Nest Thermostat to exist connected to a C wire only some exercise. Typically you won't know if your HVAC system needs a C wire until you already accept the Nest Thermostat installed. If you lot are getting low power warnings on your Nest Thermostat or low power errors displayed it typically ways that you demand to add a C wire to provide continuous ability for your Nest Smart Thermostat.
How To Get Temporary Heating and Cooling While Waiting To Install C Wire
If this is an emergency and your Nest Thermostat has quit working because you lot need a Common wire you have a couple of quick solution options. You can accept the Nest Thermostat off and accuse it using an android USB Micro B style charging cablevision and plug it into a phone charger to charge up the internal battery on the Nest Thermostat. In well-nigh cases charging the Nest Thermostat battery volition give you ane - two more than days of fourth dimension to wait for parts to arrive for installing a mutual wire for your Nest Thermostat.
The solutions we offer for calculation a common wire piece of work for both the standard Nest Thermostat and the Nest East Smart Thermostat.
Any of the options below should let you to add a C wire to your Nest Thermostat however selection #two using a Nest Thermostat C wire transformer is oftentimes the easiest option because it does not involve any wiring inside your HVAC unit.

How Install A Nest Common Wire: Options
-
Run new wiring from the HVAC system to the Nest Thermostat
-
Install a Mutual Wire Transformer
-
Rent an HVAC Professional
-
Install a Mutual Wire Resistance Device
-
Use the Fan Wire equally a Common Wire
Selection 1: Install a Nest Common Wire - Run New Wiring
Difficulty: Hard
If your Nest Thermostat is located almost your HVAC system this can be an piece of cake chore because all y'all demand to do is run new wiring from your Nest thermostat to your HVAC system. However if your HVAC organisation is not located about your thermostat it will nigh likely require yous to run new wiring through your walls from the HVAC system to the thermostat.
If you lot plan on running wiring from your HVAC organization to the Nest Thermostat we recommend using viii wire thermostat wire as that will provide yous the virtually flexibility in time to come installations. You need to have ane actress wire for the common wire on the nest thermostat. So if your system uses five wires you demand +1 or a six conductor wire. If your system uses 7 wires you need + ane or a eight conductor wire. Having extra wires does non hurt anything so it's best to be safety and utilise eight conductor wire which should work for 99% of applications.
Recommended Nest Thermostat Mutual Wire 8 Usher Wire
You will need to observe a routing method to add the Nest Thermostat C wire from your HVAC system to your Nest Thermostat.
Step i: Nest C Wire Installation Determine Wire Path
Determine routing method, do you take a directly shot to your Nest Thermostat? Can you drill a hole from where the thermostat is located to the HVAC system? Or do you need to plan on routing the wires through the wall. If you plan on doing this information technology's best to attempt and run the wiring in unfinished basement infinite or an cranium to easily pull the wire. You lot volition then demand to drill a hole underneath where the thermostat is located or look for the existing thermostat wire. If at that place are no in wall obstructions y'all can sometimes tape the new wire to the quondam wire and just pull the old wire out with the new 1 attached. This will only work if you don't have any in wall obstructions.
If you will need to fish the wires through walls getting a fix of wire fishing rods and a drywall saw or multi tool to cut holes in the drywall volition be helpful. I e'er recommend using a multi tool like the Milwaukee Multi Tool I take considering it makes patching quick and easy with it'south clean cuts. You can use the cutout as a patch for the pigsty you made in the drywall.
Step two: Nest Common Wire Installation Run Wire
In this step you lot will need to run the wire, using the methods you take available. If you are trying to pull the new wire past pulling out the old i yous should take pictures of the existing connections on your HVAC system and your thermostat before you offset. Brand sure yous record the 2 wires tightly together merely practise non increase the profile of the wire or employ and so much tape that information technology will become snagged. This does not work in all instances and you need to work slowly and advisedly.
Step 3: Nest Common Wire Installation HVAC Wiring
With the wire now pulled you lot will need to reconnect the wires at your HVAC equipment. Brand sure the equipment is off, you can practice so typically by turning it off either with a switch on the side of the unit or at the circuit breaker. Accept the comprehend off, and await for the excursion board. On the circuit board in that location volition be different terminals labeled R, W, Y, G, C. See the pictures below. Yous will now require the terminals as they y'all had them before and utilize the flick you took to re-wire proper HVAC terminals. This time with the extra wire you installed you lot will wire one of the wires to the C wire on the HVAC organisation. Take note of the wire colour that you lot placed on the C final in the furnace.
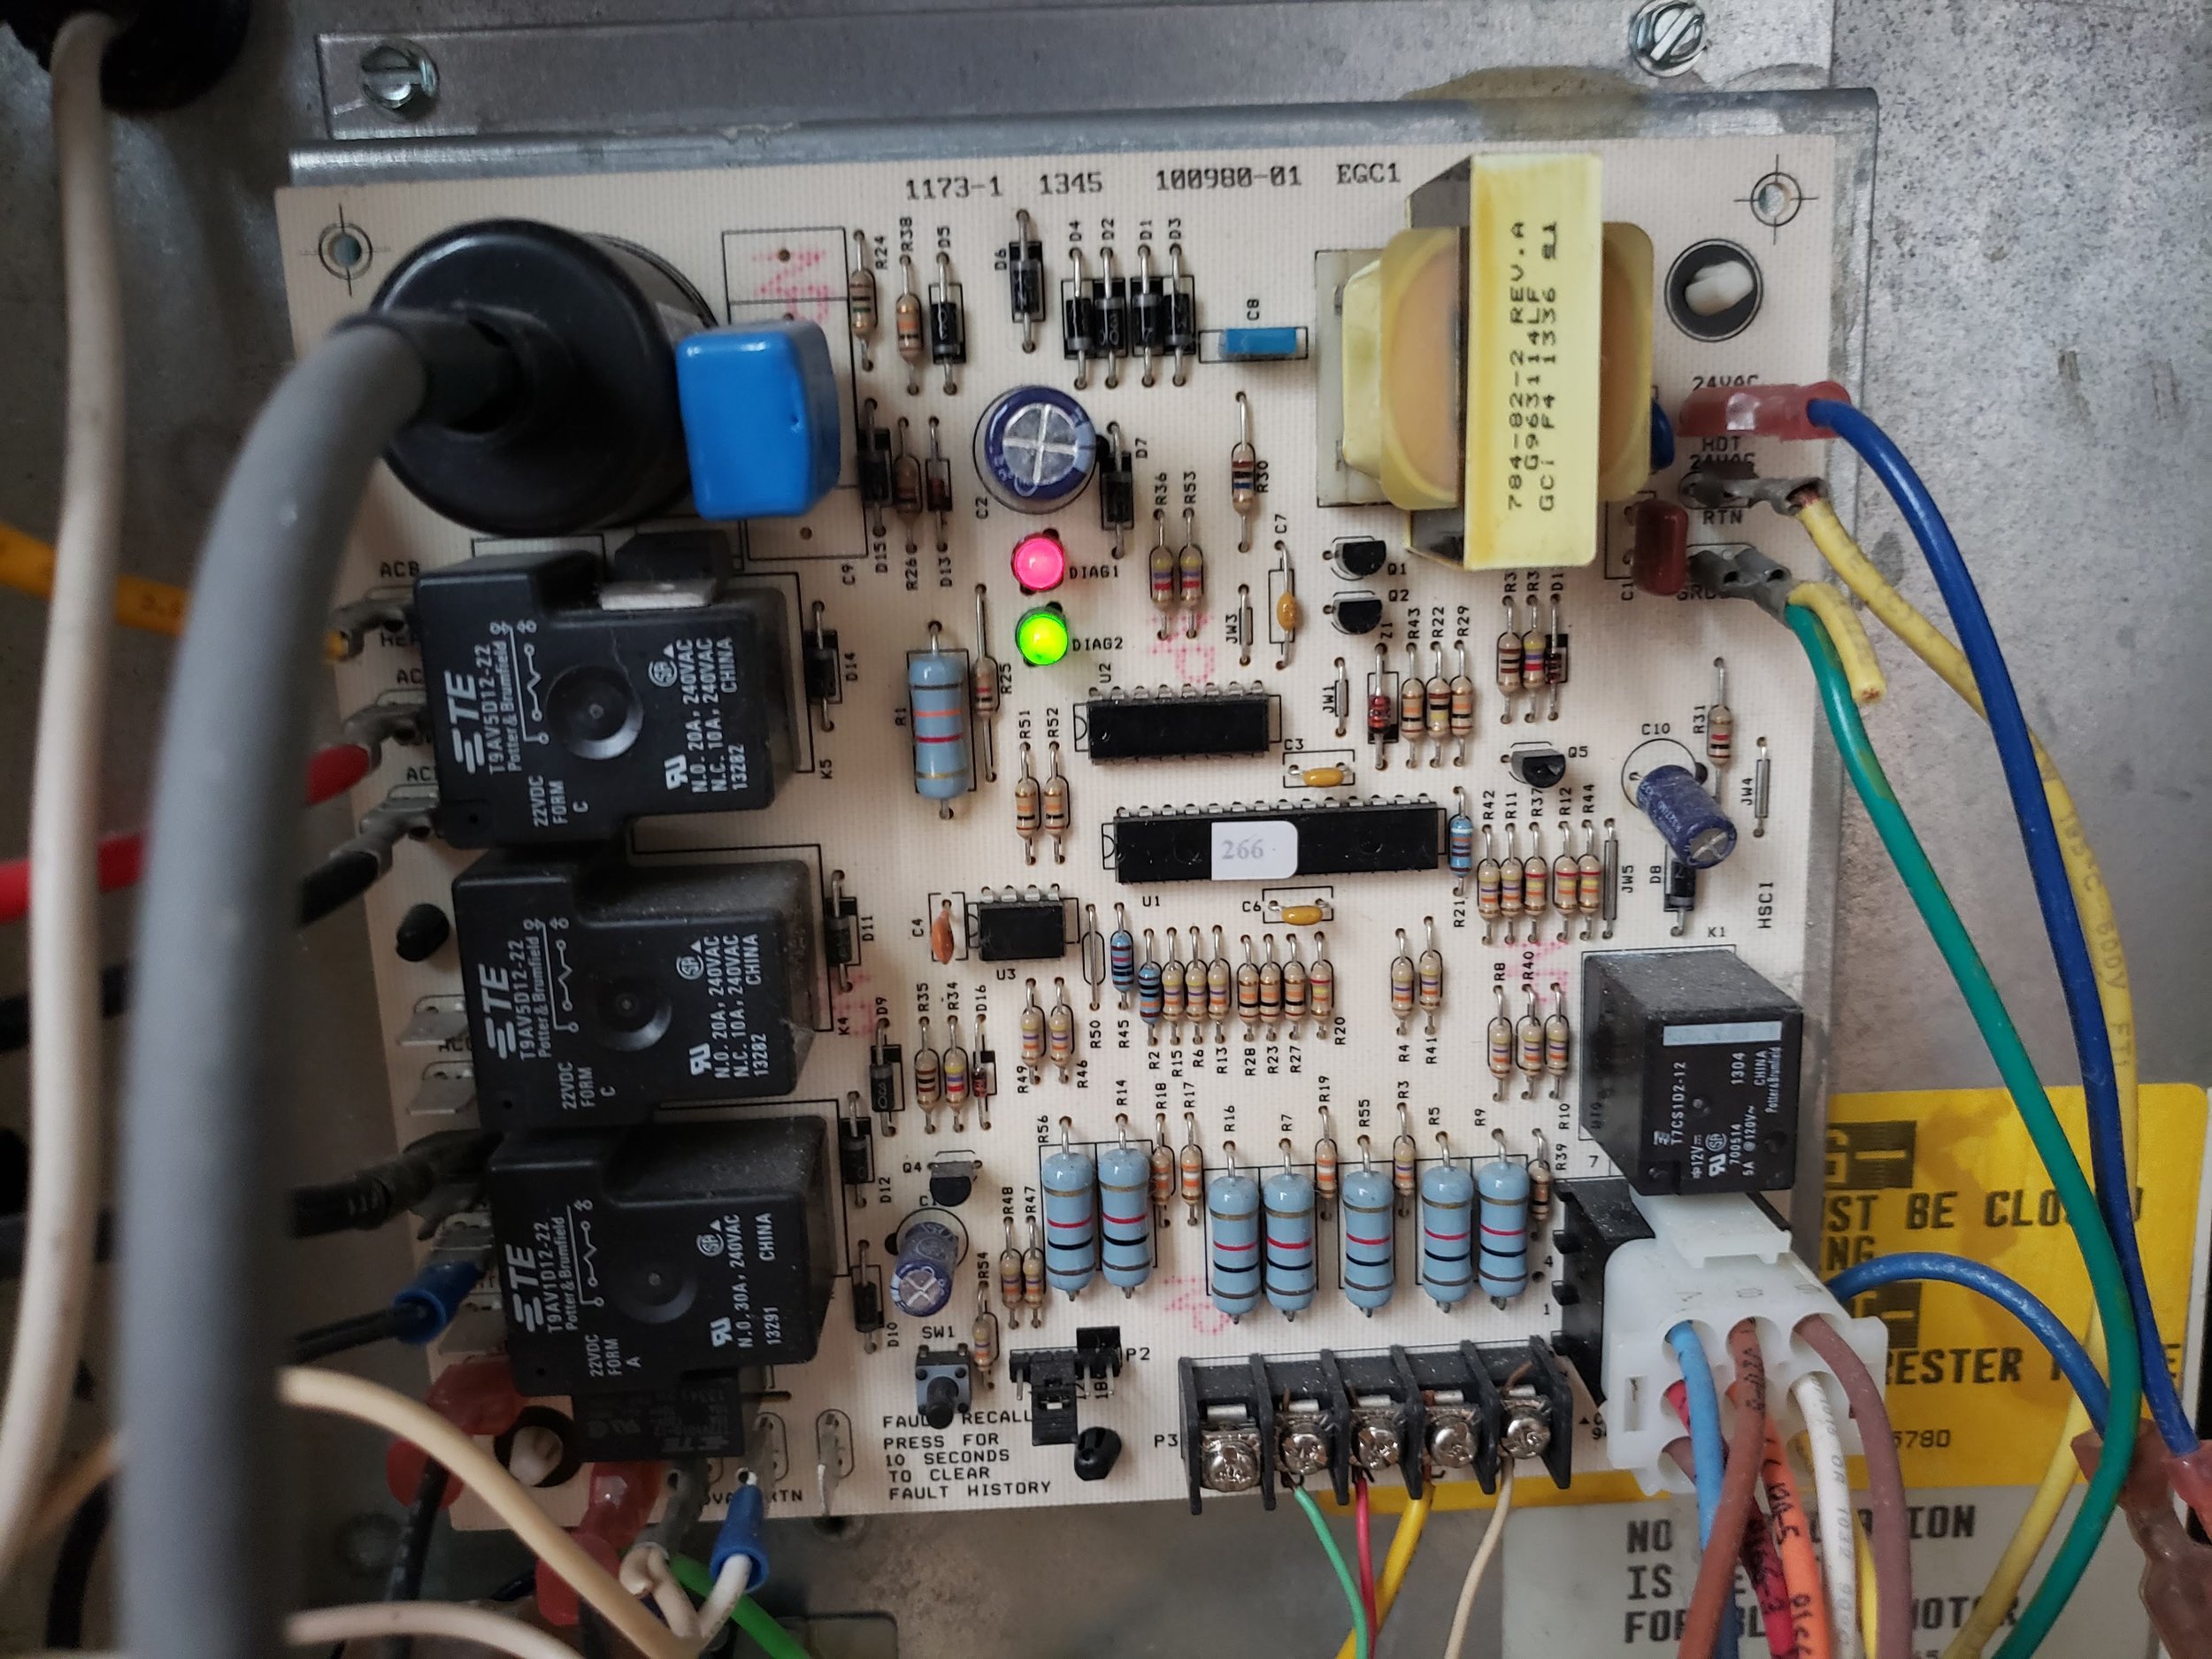
Instance of a thermostat circuit board showing the terminals located at the lesser right fo the picture.
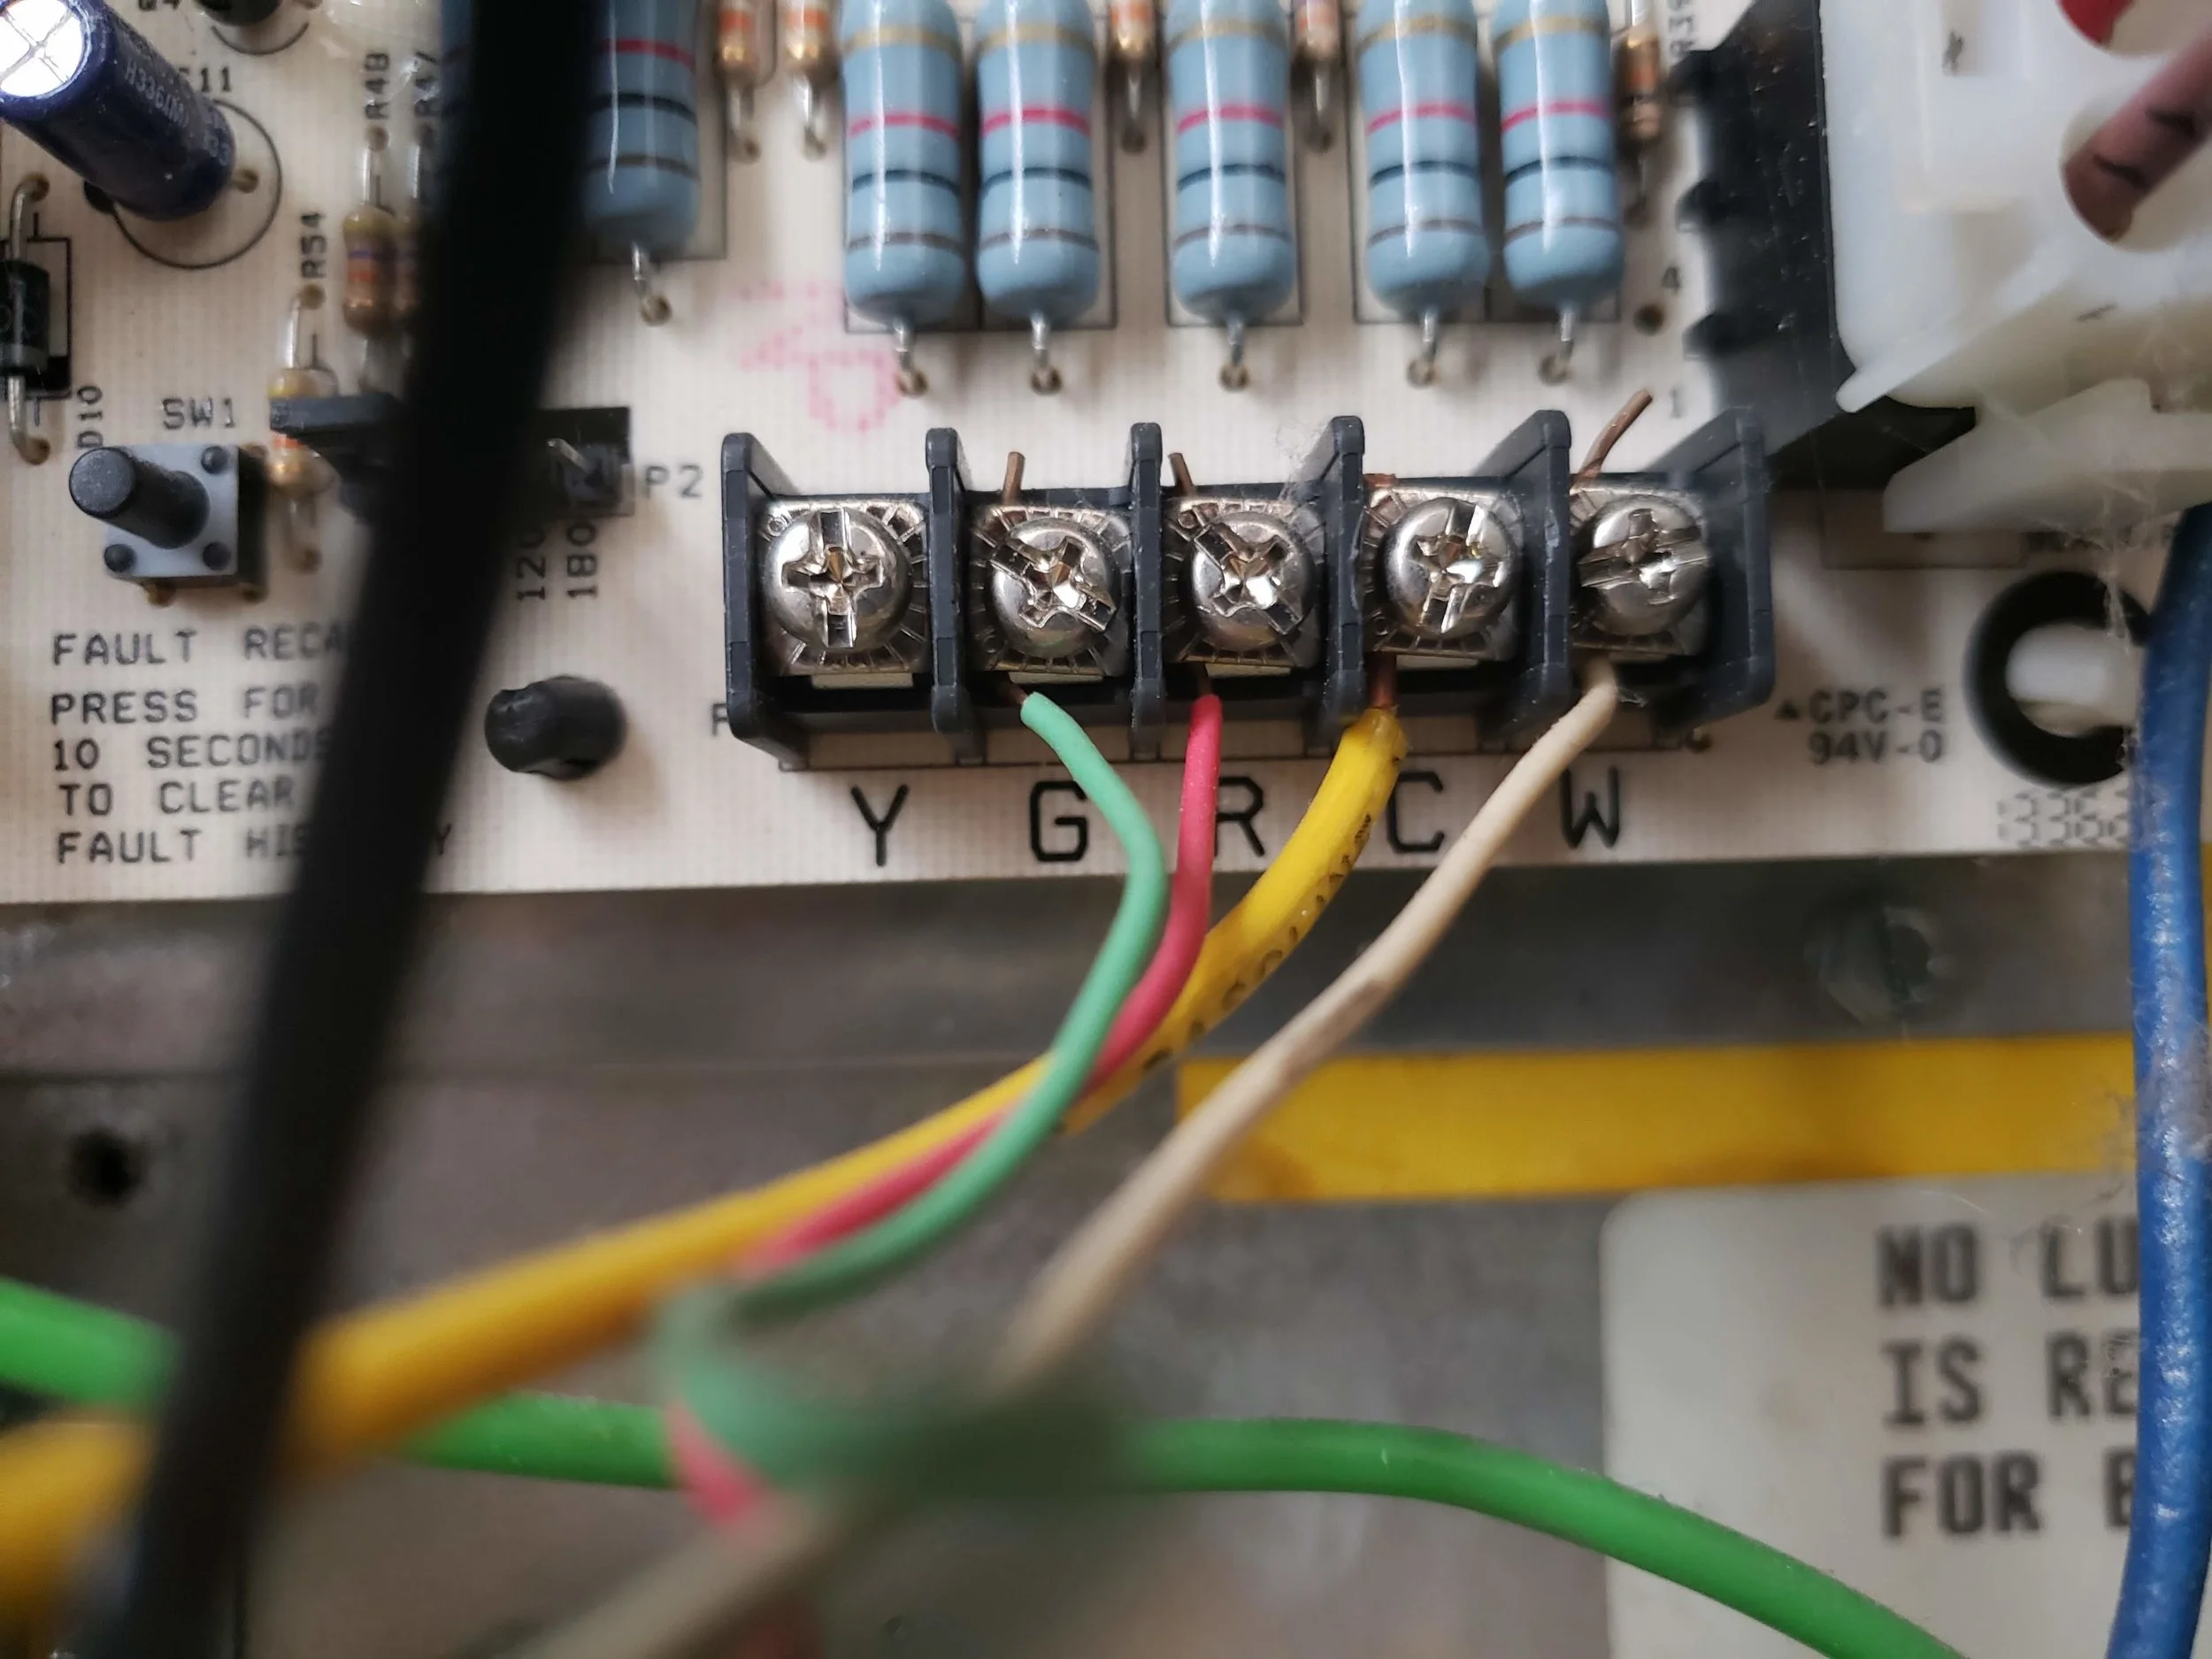
Hither we show the thermostats terminals where C wiring would exist attached to the Nest Thermostat. Each HVAC arrangement is slightly unlike, but the lettering conventions are the same across the bulk of HVAC systems. This HVAC system has a C wire installed, it's the yellow wiring shown on the C (Common) wire terminal.
Step 4: Nest Common Wire Installation Nest Thermostat Wiring
With the wire now installed on the HVAC organization it is time to connect information technology to the Nest Thermostat. You lot volition wire the same color wires that y'all placed on the terminals in the furnace to the Nest Thermostat. Then you lot cherry R wire on the HVAC system should be wired to the R wire on the thermostat and so on. With the wire that you lot used for the C wire on the HVAC system y'all will now wire that into the C terminal on the Nest Thermostat.
Step five: Nest Common Wire Installation - HVAC Startup
Now that you have all the wiring installed replace the cover on the HVAC arrangement and install the Nest Thermostat on information technology's base. When complete plow the Power dorsum on at the HVAC system. Follow the setup bill of fare on the Nest Thermostat and click OK to ostend the common wire is connected. With the common wire at present installed on your Nest Thermostat the Nest Thermostat will be receiving constant ability and you should not have any low ability bug.
Selection ii: Nest Common Wire Installation - Install A Transformer
Difficulty: Easy
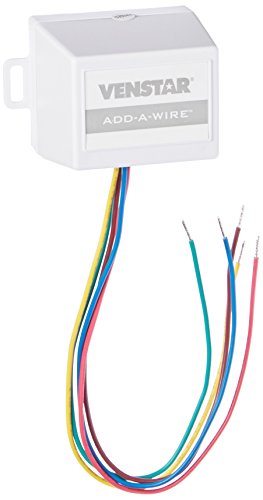
This is the easiest pick and will work for both novices and HVAC pros with minimal amount of work. For this yous will need to get a Nest Thermostat Common Wire Transformer. We have tested this 24V transformer from Fyve on multiple installations and know that it will work near furnaces.
The installation of a Nest Thermostat Common Wire Transformer does non involve whatever wiring within the furnace and can exist done with the screwdriver kit that comes with the Nest Thermostat. Beneath we have a link to the recommended common wire transformer fo the Nest Thermostat and a pic of the transformer.
Recommended Nest Thermostat Mutual Wire Transformer from Fyve
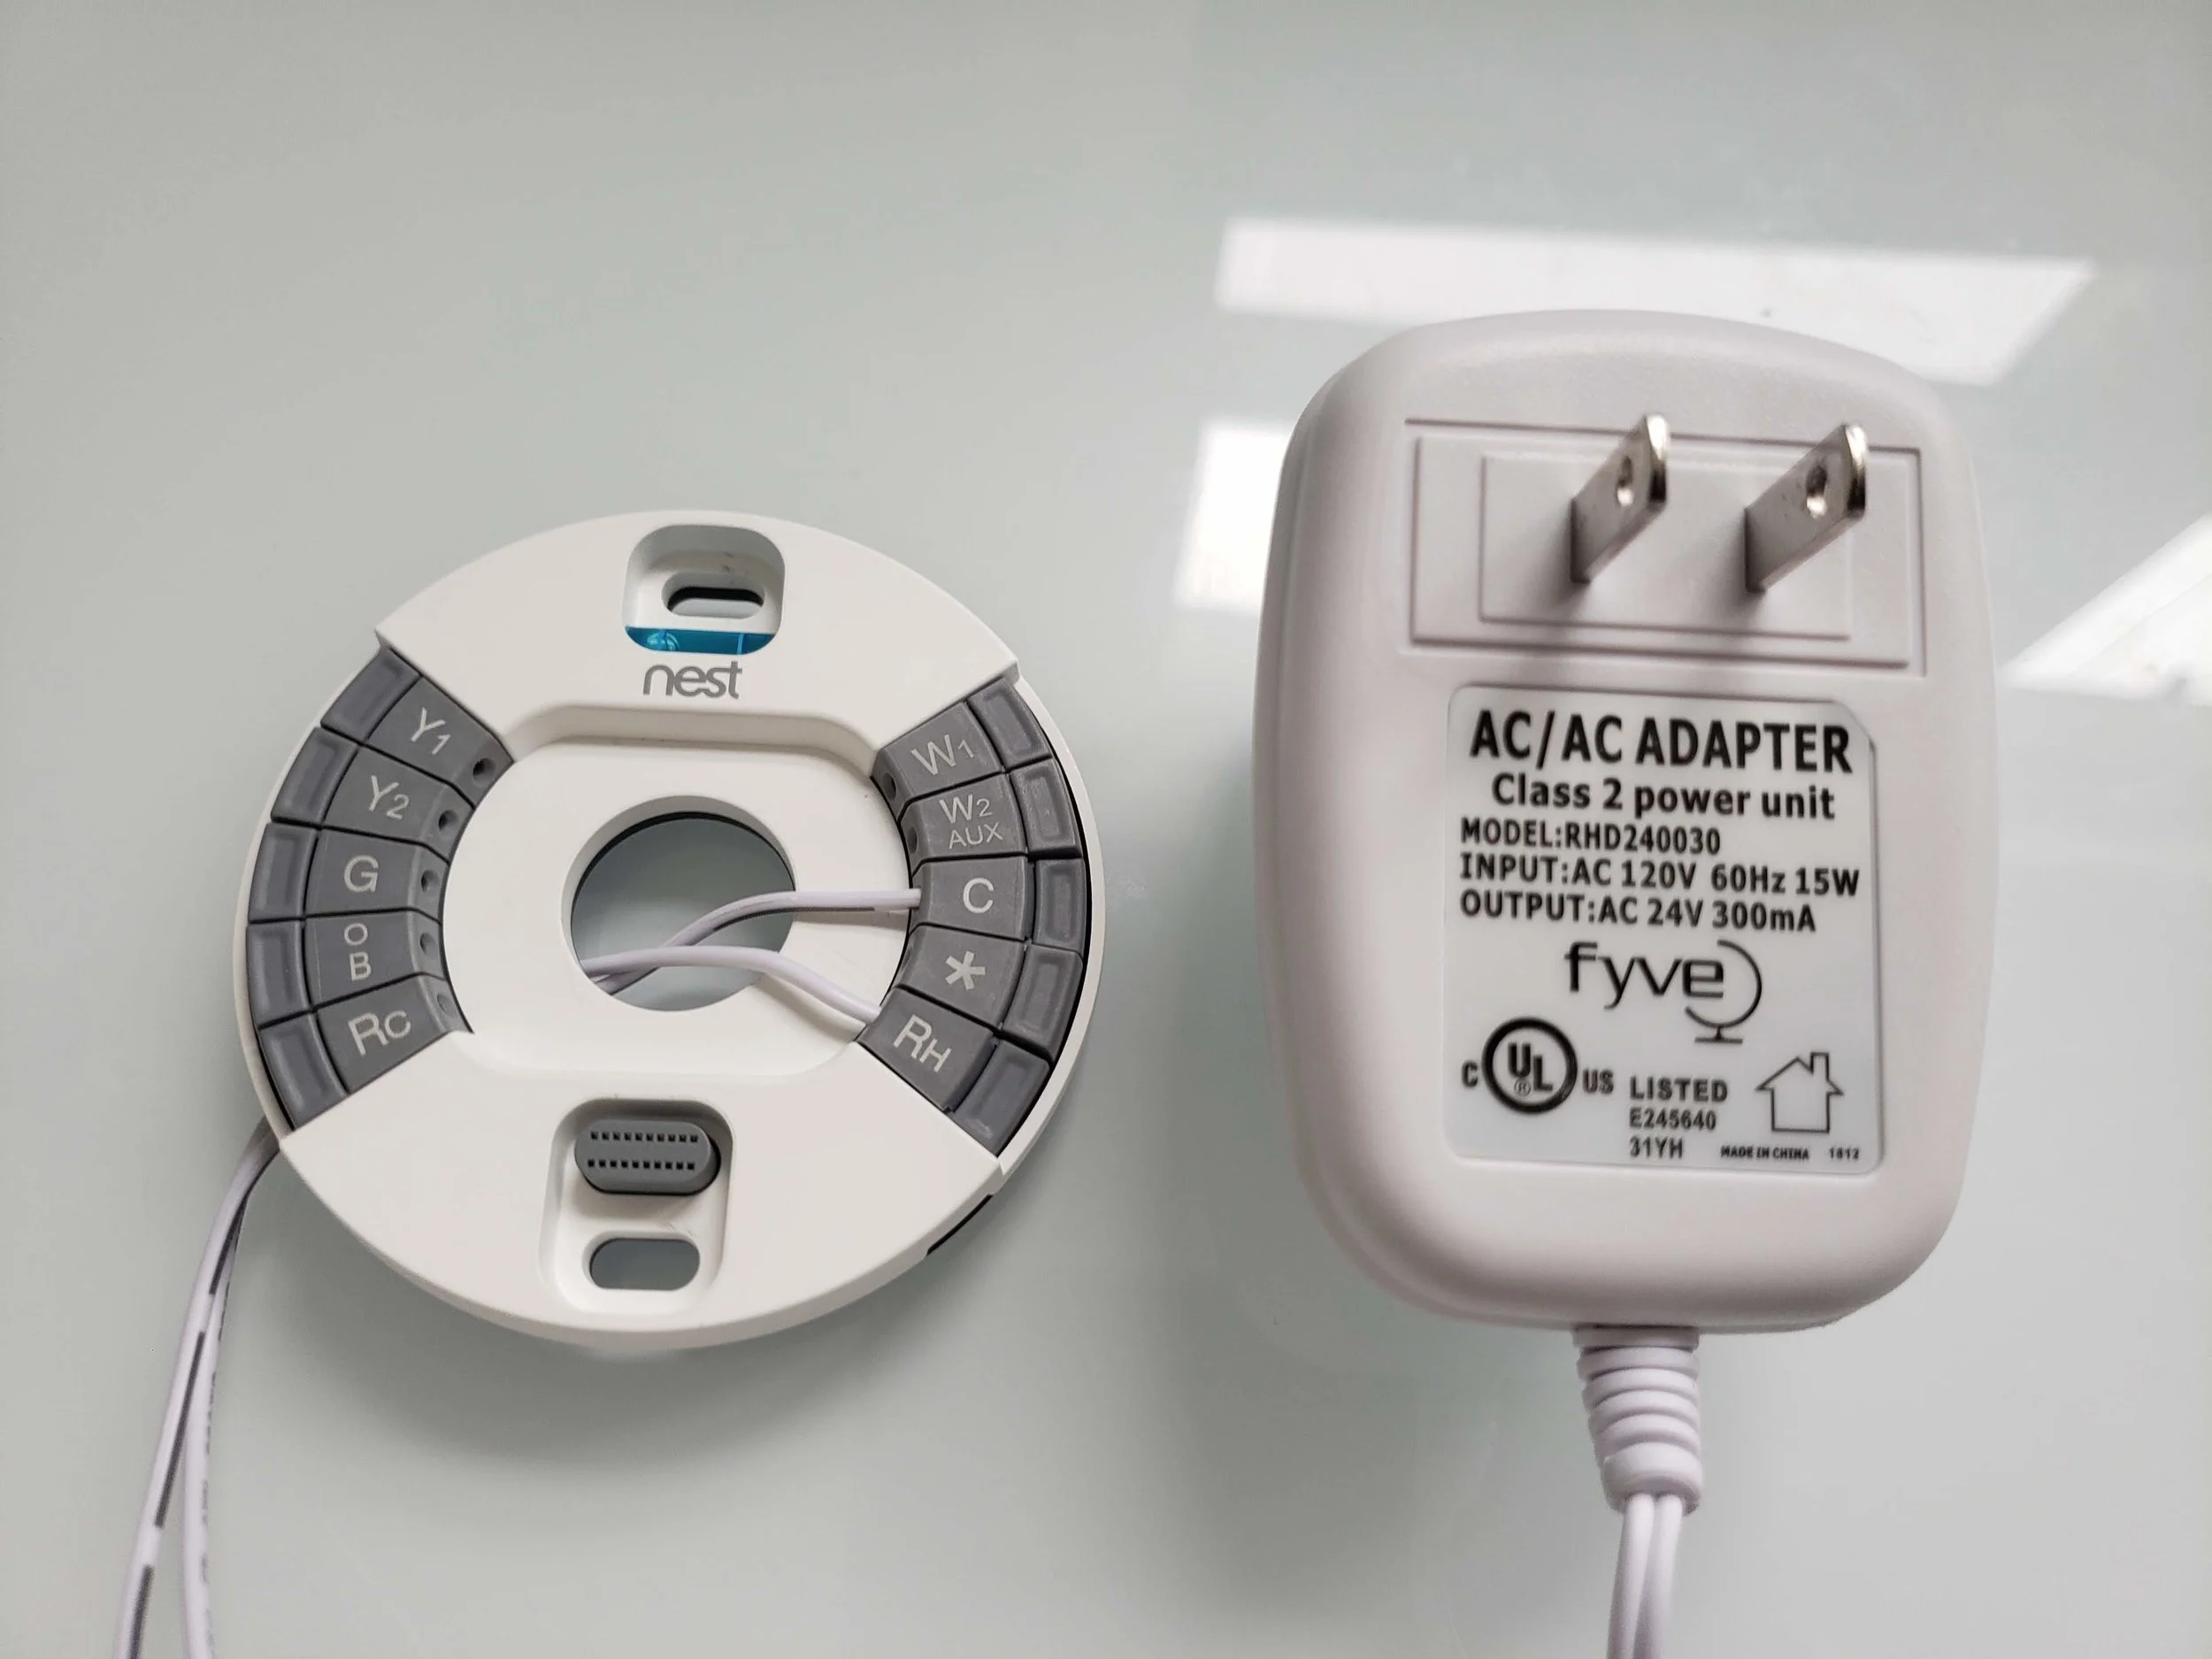
Nest Thermostat Common Wire Installed With Nest C Wire Transformer.
Step 1: Nest Thermostat Mutual Wire Installation Turn Off Power
Plow off the power for the HVAC system either at the HVAC organisation or the circuit breaker. So remove the Nest Thermostat from it's base and have a picture of your existing wiring. At present remove the existing Rc or Rh wire that yous take inserted into the Nest Thermostat. You should cover this old wire with electric tape and fold it over, and push it out of the way. Brand certain you don't push button it as well far dorsum into wall, you lot want information technology easily reachable with pliers or fingers should you need it.
If you desire to muffle the wires in wall you tin do so but should practice it in accordance with local codes and regulations. Oftentimes local codes require the wire be rated for in wall use. So you get in wall rated wire, run it in wall and so trim back the Nest Thermostat Mutual Wire Transformer wiring to the proper length and connect it to the in wall rated wiring.
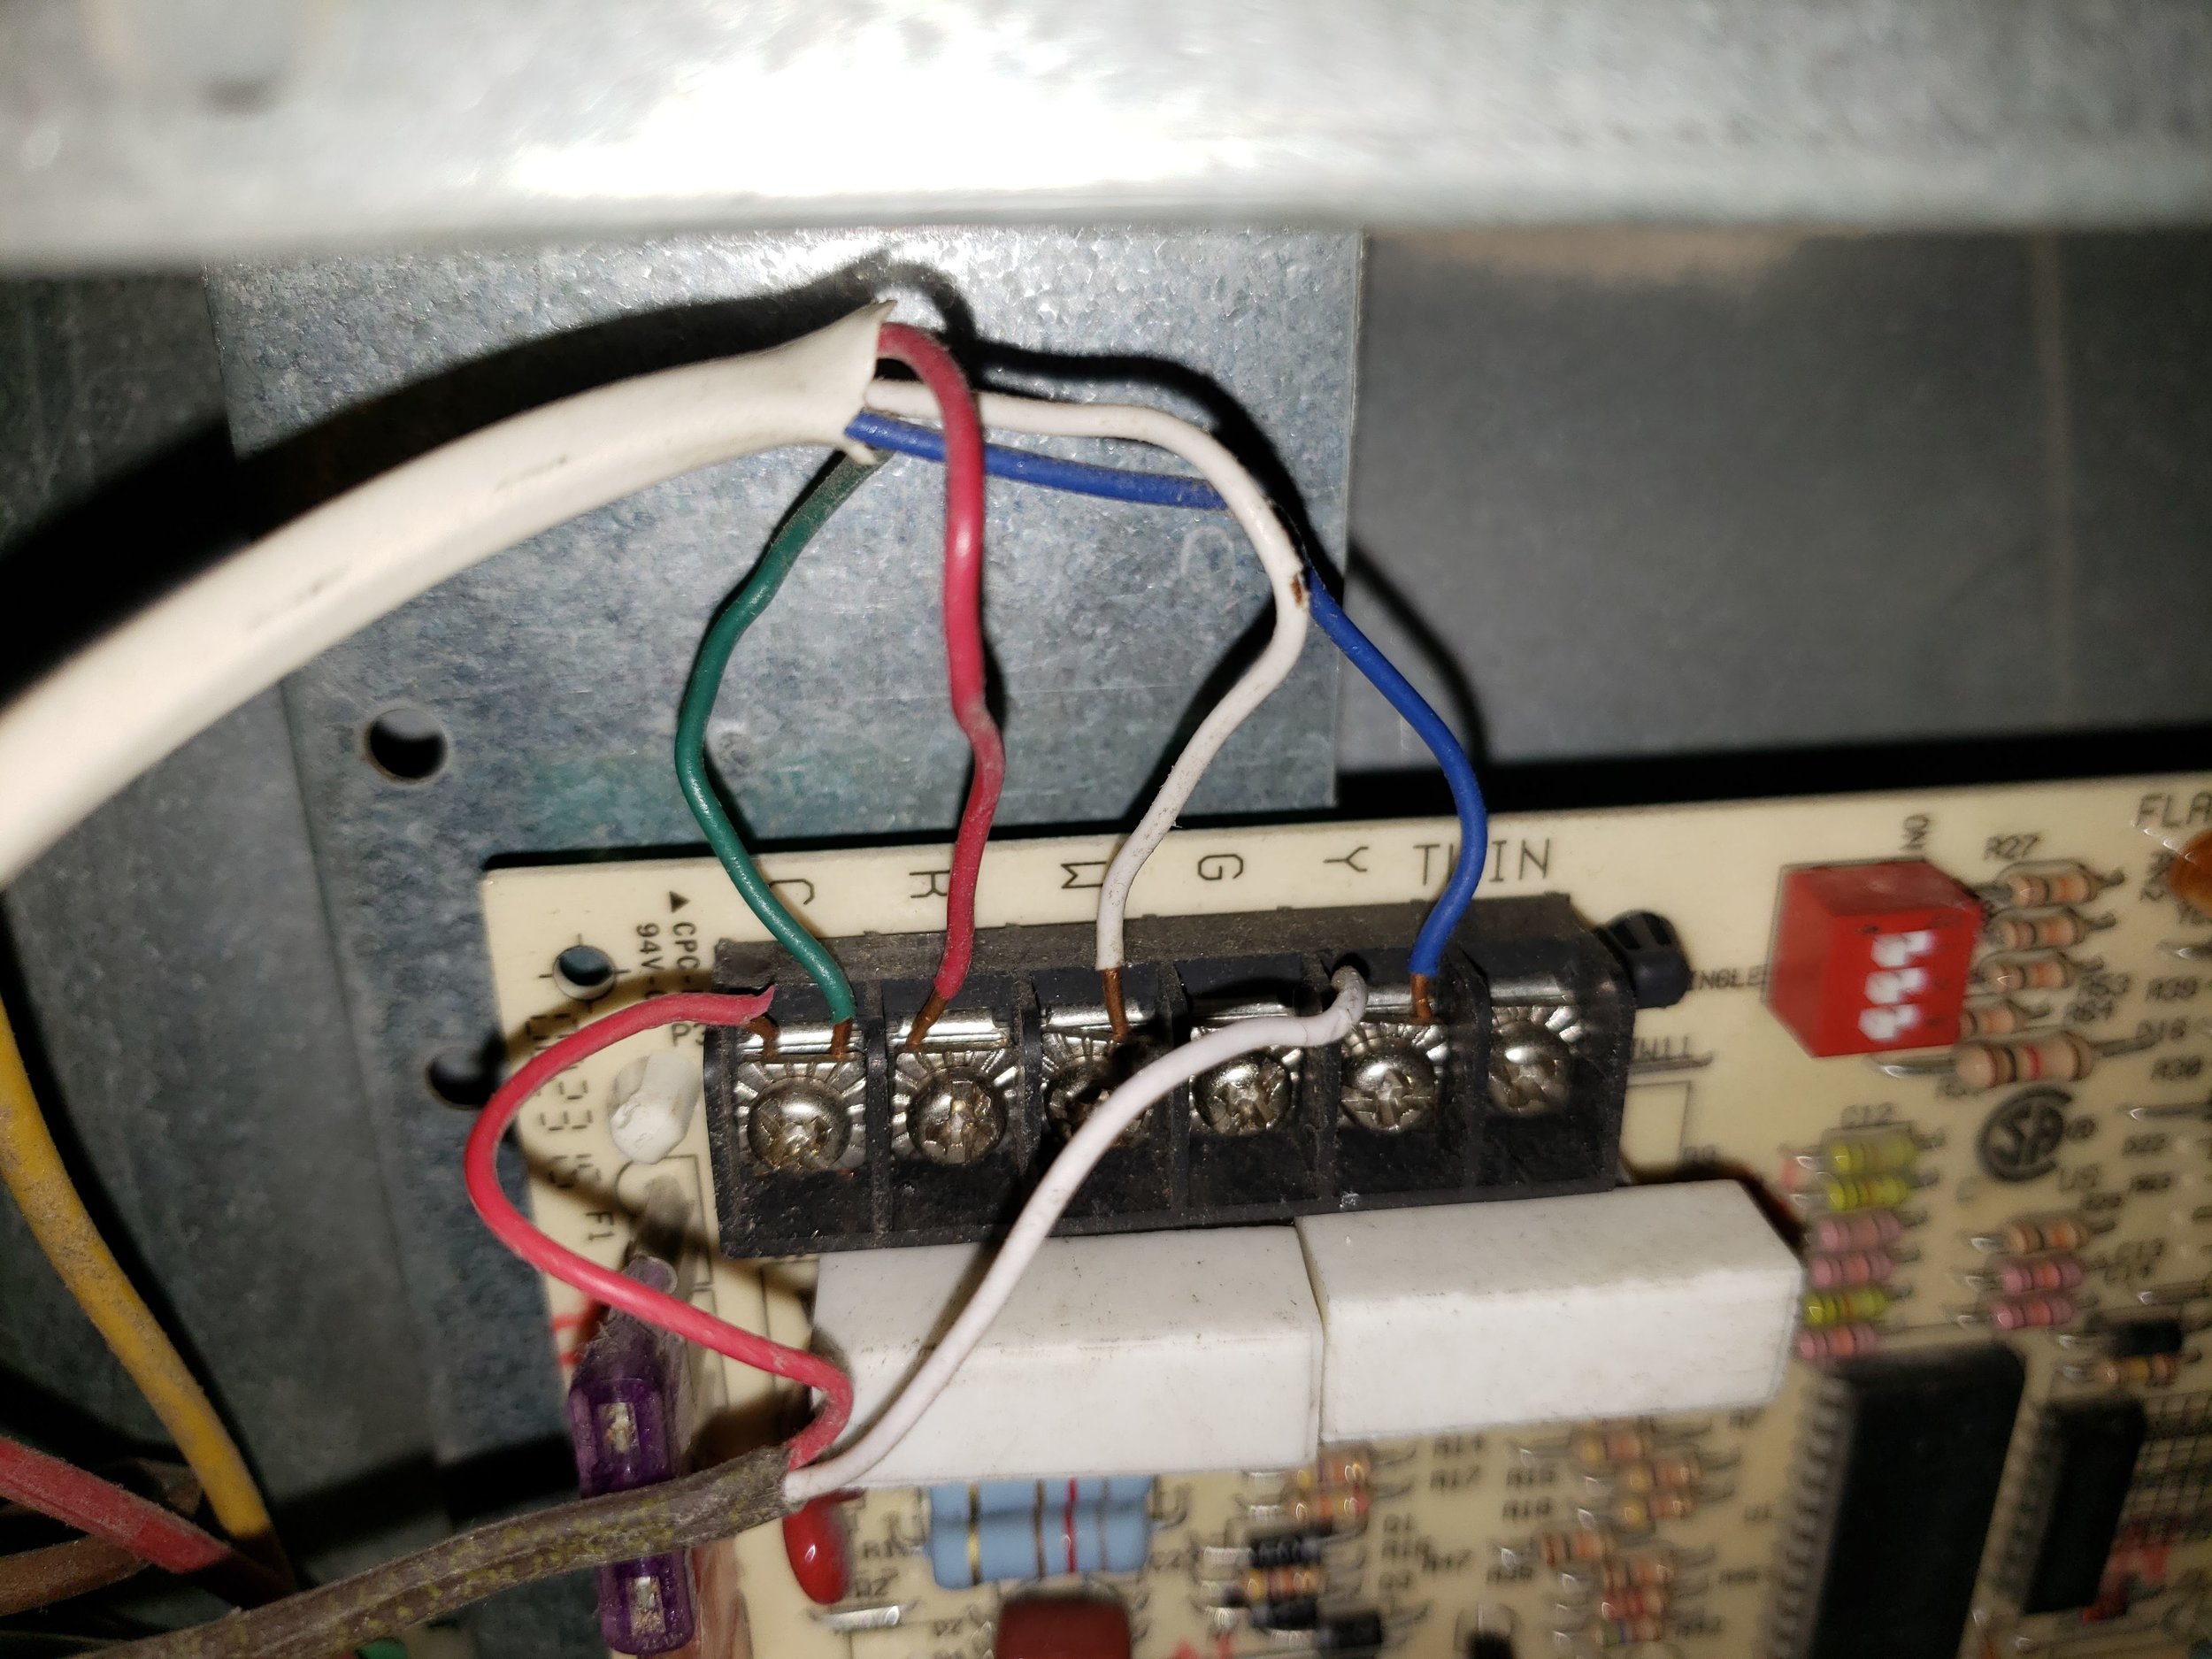
Yous will need to route the new wires backside the base and so that the Nest thermostat can be reinstalled, to exercise this you oft simply need to loosen the lesser mounting screw and you can run the Mutual Wires to behind the Nest Thermostat base Plate. Y'all and then will connect one wire to Rh and the other wire to the C final, as shown below. It does not affair which wire you wire you lot connect to each terminal every bit long every bit they are both securely connected and one wire is in the c concluding and the other is in the Rh terminal.
Step 3: Nest Thermostat Common Wire Installation Re-Install Nest
At present replace the Nest Thermostat on the Nest Base of operations Plate. Turn your HVAC back on and and so you can plug in the Nest Common Wire transformer to a standard wall outlet. The Nest Thermostat should now have total power and examination your heating and cooling to make sure that it is working.
Recommended Nest Thermostat Common Wire Transformer - One Hour Smart Dwelling Tested
Option 5: Nest Mutual Wire Installation - Utilize The Fan Wire As A Common Wire
Difficulty: Medium - Difficult
If yous have a G wire connected in your thermostat which is used to command your the fan on HVAC systems y'all tin convert your One thousand wire into a C wire in a few simple steps. The M wire is used to provide independent control of the Fan within your HVAC system. If y'all want to command your fan independently of your Air conditioning or heating to broadcast air you lot need a G wire. Most people never use the fan independently of the heating and cooling features of their furnace but some practise. This conversion volition no longer allow you to independently control the fan for heating and cooling to your dwelling house which is a deal billow for some but won't matter to others. The fan volition automatically boot on whenever you lot plow on your oestrus or cooling even without the G wire attached so no demand to worry about how your furnace volition operate.
Step 1: Nest Common Wire Installation - Use the Fan Wire As A C Wire
Plow off the HVAC system and disconnect the Nest Thermostat from it'southward base. Take a flick of the wiring.
Step 2: Nest C Wire Installation - Use The Fan Wire As A C Wire
Take the wire in the Chiliad last at the Nest Thermostat and relocate it to the C last on the Nest Thermostat baseplate.
Step 3: Nest C Wire Installation - Use The Fan Wire As A C Wire
Y'all will now demand to get to your HVAC organisation and open the covers. Y'all will need to locate your circuit board and the terminals that control the thermostat on it. Information technology should look like the picture below. When you detect the thermostat terminals you will need to take the wire on the One thousand concluding off and move it to the C last. Use a screw driver to carefully loosen the G terminal screw. Don't unscrew it all the fashion just a turn or two should loosen the wire plenty to pull it loose. You volition then demand to loosen the C wire terminal screw to place the "sometime" G wire on C wire last. Install the wire on the C terminal as shown beneath. With the C wire installed tighten the screw, and put the HVAC covers back on.

Pace four: Nest C Wire Installation - Use The Fan Wire Every bit A C Wire
With the C wire at present installed should re-install the Nest Thermostat. With the Nest Thermostat re-installed turn the ability back on to the HVAC arrangement and follow the instructions on the Nest. Your nest thermostat should now have enough power to piece of work properly.
How To Install A Nest C Wire : Summary
If you demand a C wire for your Nest Thermostat there is an installation selection that will fit all skill levels. I've found that for most people using the Nest C wire transformer is easiest solution as it does not require to open upwardly your HVAC arrangement. If you lot are a little bit more handy using the fan wire every bit a C wire is a good pick as well but it will limit the fan command on your HVAC and you volition no longer be able to have contained fan control of your HVAC system if you lot want to circulate air with the furnace off.


Source: https://www.onehoursmarthome.com/blog/nest-thermostat-battery
0 Response to "How To Check Nest Battery Level"
Post a Comment